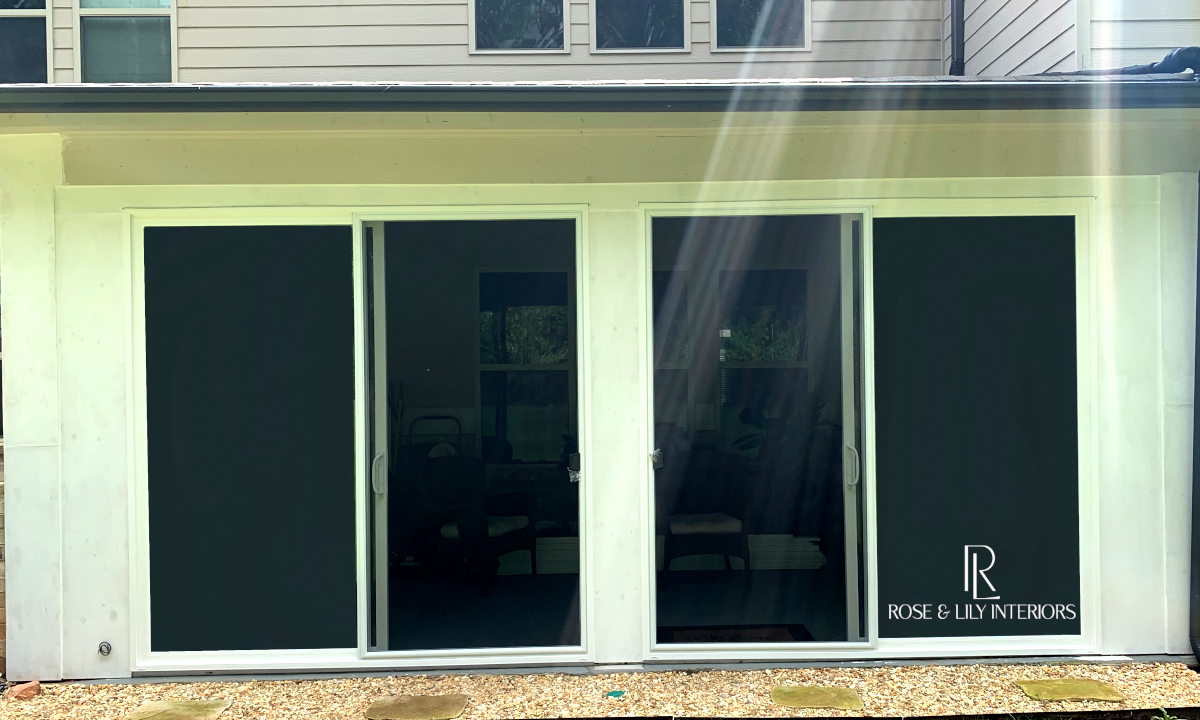
In week 5 of our DIY Sunroom project, we focused on the exterior trim and caulking. It is really starting to take shape now and we don’t have far to go before the outside is complete! If you’re just tuning in, be sure to read the previous posts for this project starting here.
Exterior Trim Strategy
Since there is very little wall space around the new windows and doors, we decided to make the entire wall exterior out of trim. We thought that would have a cleaner look than using siding all around them. It is also easier! Plywood provides the best coverage in this case as most trim boards max out at 12 inches wide. Typical plywood is too rough and grainy for trim, so I used more expensive cabinet grade plywood. This will give us a nice finished look.
Right Side Trim

Installing the exterior trim was pretty similar to what we did for the exterior sheathing. We measured the pieces we needed from the large 4ft x 8ft sheets of plywood and cut them to size. The difference this time was that we needed to prime all sides of the boards before nailing them in place. We used a good quality exterior primer which seals the wood to stand up to the weather. It was time consuming but will be worth it in the long run.
Another important detail to remember was to leave a small gap at the bottom of the trim and concrete slab. This is so that moisture sitting on the concrete slab would not cause the wood trim to rot over time. Again, the sloping floor on this side caused the bottom piece not to be perfectly square. After a few tries we got the piece the right size.
On this wall, I also needed to make a custom trim piece that went on top of the siding. This trim piece covers all the gaps between the new sunroom wall and the uneven siding next to it. Even though I had filled in those gaps with foam weatherstrip tape and caulk, this extra piece will make it more polished looking than caulk alone. Making this piece was tricky as I need to follow each overlapping piece. I measured carefully and traced onto the would piece I planned to use. Then I used a circular saw to cut the longer lines and my favorite multi-tool to cut the short lines. I had to do a lot of fine tuning with my multi-tool to get a snug fit. Once the piece was ready I also primed it before nailing it in place.
Left Side Trim

On the left side wall, I followed the same steps. I did not have any tricky trim pieces to cut, but I did have a large seam down the middle of the wall that we wanted to cover up. I decided to use a piece of PVC lattice trim to cover up the seam. To avoid nail holes, I glued it in place with construction adhesive after cutting it to size.
Also on this side, I installed an exterior outlet box so that I would have access to power on the outside of the sunroom. This is also code! The previous outlet box is now enclosed in the sunroom, so I just moved the box to the outside. To prepare for this, I ran an exterior grade power line along the inside of the left wall. I did not hook this line up to power yet as that will be a later project, but at least I will have the line ready for use when the time comes.
Caulking
The last step for this week was to add exterior caulk to all of the seams and edges of the trim on all three walls. The caulk seals everything up keeping the water out permanently. This part fools me as I think I will be able to knock it out quickly. It always takes much longer than I think it will though. I have to admit also that exterior caulk is harder to work with than the interior caulk. It is a necessary and worthwhile step though.
And there you have it: week 5 is done! Next week we start working on the inside where we will be putting in the insulation and walls. Be sure to check back next week for details. Have a great week!
#roseandlilyinteriors #faithfilledinteriors #diydesign #homedecor #diydecor #interiordesign #porch #diyproject #diyprojects #inspiration #roseandlilysunroom #homeinspo #houseinspo


